Addicted to Rubber Stamps and GlueDots!


Hi everyone, and thanks for hopping along with Glue Dots and Whimsy Stamps blog hop!  
There are lots of different prizes to be given away plus a $100 value Grand Prize too!

To enter into the giveaways, all you need to do is comment on EACH blog throughout the hop. Then for the grand prize, after you have commented on all stops along the way, use the linky tool on the last stop and enter your name and email address.
Winners will be randomly selected and will be announced on the Whimsy Blog on Monday 9/3/18.  Have FUN and enjoy the hop!!

And now to share with you my project...


I started out with a white 4 x 5 1/4 piece of card stock and used the Teardrop Stencil (this is such a cool stencil, it can be used for countless different looks) to sponge on distress inks (salty ocean & wilted violet).  Then I cut off a strip of it to use for the bottom of the card and used the leftover portion to stamp the t-shirt on.  


I stamped the t-shirt from the Addicted to Rubber Stamps set with Versafine Clair black ink.  This set has lots of options for you to customize your t-shirts with funny sentiments that are sure to give any stamper a giggle or two.


 I used a marker to color in the purple collar and other bands on the t-shirt and once I had everything  customized the way I wanted it I hand cut the shirt out and popped it up with foam tape.  


For the top purple panel I used the Wavy Edgers die and Shaker Maker Combo die to cut out the stitched circle opening and curved scalloped edge.  Then I matted everything onto a black card base.


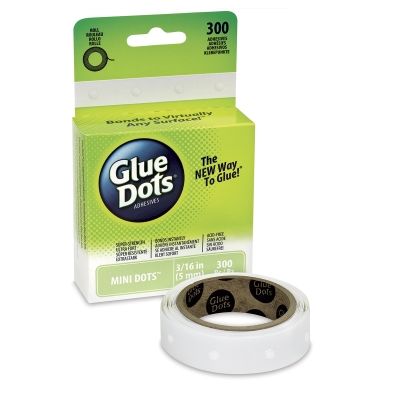
The final touch was using Glue Dots to apply my sequins.  I love using Glue Dots for sequins because they aren't messy like liquid glues and there's no chance of glue seeping out onto the card.  Additionally I find with liquid glues that the sequins can pop off easily whereas you would need to pull off ones applied with Glue Dots.  I use the mini dots for most sequins but if they are still too big I can easily just cut them into a smaller size.


 Thanks for hopping by and to leave a comment see the SHARE buttons at bottom of this post and click on the word bubble :o).   


Visit all of these blogs and leave a comment at each for your chance to win hidden prizes!

93

Ombre or Gradient Seashell Background?


Some say ombre some say gradient, so what's the difference?  Technically gradient is a progression of different colors from light to dark and ombre is the progression of hues of the same color from light to dark. So for today I'm sharing a gradient background with you using the Seashell background from Whimsy Stamps.  Or is it an ombre background since teal is a combo of blue and green - lol??


I stamped the Seashell background with Versamark ink onto cold pressed watercolor paper and heat embossed it with white embossing powder.
With a paintbrush I washed on a light coating of water all over the background, I started with my lightest distress ink (tumbled glass with a little evergreen bough) and washed it onto the entire piece.  Then I washed on the next darkest color (broken china) but only on the middle portion, then my final color (faded jeans with a little mermaid lagoon mixed in) 
Once it was dry I added some deeper color to various portions of each section.


The sentiment is from the Everyday Scripted Sentiments clear set and the bubbles are form the Salty Hair clear set.


I also added a little color to the bubbles with a damp (not wet) paintbrush using the tumbled glass distress ink.


I hope you enjoyed this Seashell background post using the ombre watercolor technique.  And I hope you are soaking up the last couple of weeks of summer.  Although here in Florida we have months of of the summer weather left ahead.

Seashell Background Rubber Cling Stamp Everyday Scripted Sentiments Clear Stamps  Salty Hair Clear Stamps

Thanks for stopping by...see you soon,


4

Crazy Cat Lady


Do you know a Crazy Cat Lady or are you the crazy cat lady??? 


For this card the Crazy Cat Lady was stamped with Memento black ink so I could safely use my Copic markers to color it.


Once it was all colored I stamped the sentiment with black Versamark ink.


The cats with their back legs poking out just crack me up!  


 This was a quick and easy card that was fun to color.  I hope the Crazy Cat Lady makes you smile today :o). 

Crazy Cat Lady

Thanks for stopping by...see you soon,


2

Paper Door - Cuter than a Panda Butt

Here's a cutie patootie card made with the August PAPER DOOR kit called Panda Butt.  


This kit has fun stuffs like action wobbles and pompom tails. :)


With your Panda Butt PAPER DOOR kit you'll receive step-by-step instructions for this card and at least 4+ other cards!


Isn't his little wiggle butt so cute?!  :)


One of the many great features and benefits to you is you can view all the kits contents before you buy in this unboxing video HERE.


I tried to capture in this photo the sheen on the green cardstock, but it doesn't even come close to doing it justice.  
You just have to feel this cardstock in person, it's like sheeny, silky goodness, it's gorgeous!  Not to mention the beautiful white glitter paper also included in this kit.  These papers are to die for!


Have FUN with your Panda Butt PAPER DOOR this month!  


Thanks for stopping by...see you soon,


0

Kung-Fu Panda!


 I have a card for you today using a clear stamp set that is a great addition to the Panda Butt set.  This set is called Panda Hair Don't Care and it's available to purchase HERE without a kit. 

If you haven't heard, the Panda Butt PAPER DOOR has been re-released for a limited time and is almost sold out again!


I love this chunky panda and the expression on his face.  For this card he seems obviously a boy panda but there's a bow in the set that can turn this into a girl panda.  It can also be used as a bow tie to for a boy bear for more formal occasions too (tee hee).  Take a peek at THIS post for a girly girl panda ;).


There's a set of individual lanterns in the Panda Hair Don't Care set and I colored them for this card with copic markers.  


The sentiments are punny and fun and definitely go perfectly as an addition to your Panda Butt set.  If you "get" this sentiment you're probably close to may age ;), I used to love this song when I was a kid, still do!


All the black parts of the bear are open to color, I chose to go with the traditional black and white panda for this project but you can certainly have fun with that too.  Oooh, that makes me want to make a paper pieced panda, hmmm to be continued ;)!


I hope you enjoyed today's post, have a pandastic day (I couldn't resist)!

Panda Hair Don't Care Clear Stamps

Thanks for stopping by...see you soon,


0
Back to Top